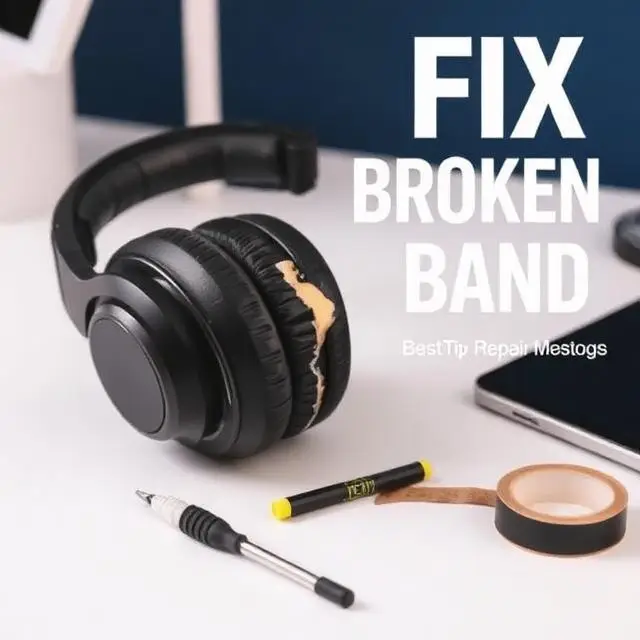
A broken headphone band can be frustrating. Especially when your headphones still sound perfectly fine. Fortunately you do not always need to replace the entire pair of headphones. Depending on where and how the band is broken you may be able to repair it at home using adhesive reinforcement material tape or a replacement part.
Thank you for reading this post, don't forget to subscribe!If you are searching for how to fix broken headphone band the most important thing to understand is that the headband experiences constant bending and pressure. Simply putting glue on the crack may provide a temporary fix. However it can fail when you stretch the headphones over your head.
For a stronger repair the broken area should usually be reinforced instead of relying only on glue.
Why Do Headphone Bands Break?
Headphone headbands experience repeated stress every time you put your headphones on or take them off. Over time this can create cracks or completely snap the plastic.
Some common causes include:
- Accidentally dropping the headphones
- Sitting on the headphones
- Bending the headband too far
- Keeping headphones in a bag without protection
- Repeated daily stretching
- Weak plastic around hinges
- Age related plastic fatigue
- Excessive pressure on one side
- Accidental impacts
The area above the earcups and around adjustment mechanisms is especially vulnerable because these areas experience significant mechanical stress.
Can You Fix a Broken Headphone Band?
Yes. In many cases a broken headphone band can be repaired.
However the best method depends on the type of damage.
| Type of Damage | Recommended Solution | Difficulty | Durability |
|---|---|---|---|
| Small crack | Plastic adhesive plus reinforcement | Easy | Medium |
| Split band | Epoxy plus splint | Medium | High |
| Completely snapped band | Reinforcement splint plus epoxy | Medium | High |
| Loose hinge | Replacement hardware or part | Medium | High |
| Broken internal wire | Wire repair plus structural repair | Hard | High |
| Severely damaged band | Replacement headband | Easy to Medium | Very High |
| Temporary crack | Strong tape | Very Easy | Low |
The main thing to remember is that glue alone is not always enough. A headphone band needs to flex. Therefore the repaired area must be strong enough to handle repeated movement.
How to Fix Broken Headphone Band With Epoxy
One of the better DIY methods for a cracked or snapped plastic headband is using a two part epoxy together with a reinforcement piece.
This method can be stronger than simply applying glue because the reinforcement helps distribute bending force away from the damaged area.
What You Need
Before starting collect the following items:
- Two part plastic epoxy
- Thin plastic or metal reinforcement strip
- Fine sandpaper
- Isopropyl alcohol
- Clean cloth
- Painter’s tape or electrical tape
- Scissors or small cutters
- Disposable mixing surface
- Gloves
- Small tool for applying epoxy
Before repairing expensive headphones check the manufacturer’s warranty and repair options.
For example Sony provides official support information for headband repair on certain headphone models.
Sennheiser also provides official information about spare parts for supported products.
Sennheiser Spare Parts Support
Step 1: Inspect the Broken Headband
First carefully examine the damaged area.
Look for:
- A small crack
- A complete break
- Cracks near the hinge
- Damaged adjustment rails
- Exposed wires
- Broken plastic around screws
If the headphone band is broken but the headphones still produce sound normally the repair may only require structural reinforcement.
However if wires have also been damaged the repair becomes more complicated.
Check the Wires Before Applying Adhesive
Some headphones route wires through the headband.
If you see exposed wires near the break do not cover them with epoxy.
Carefully move them away from the repair area and protect them with tape.
If the headphones contain a battery or electronic components near the damaged section use extra caution.
For expensive headphones professional repair may be a better choice.
Step 2: Clean the Broken Area
Before applying adhesive clean the plastic.
Use a small amount of isopropyl alcohol on a clean cloth to remove:
- Dirt
- Oil
- Dust
- Sweat residue
- Grease
Allow the area to dry completely.
Cleaning is important because dirt and oil can reduce the strength of the adhesive bond.
Step 3: Sand the Plastic
Use fine sandpaper to gently roughen the plastic around the damaged area.
Do not remove large amounts of plastic.
The goal is simply to create a slightly rough surface that gives the adhesive more grip.
Sand the area where the reinforcement will sit.
After sanding remove all dust before applying epoxy.
Step 4: Prepare a Reinforcement Strip
This is one of the most important steps when learning how to fix broken headphone band.
Instead of depending entirely on adhesive create a small splint.
You can use a:
- Thin plastic strip
- Strong nylon strip
- Small spring steel strip
- Rigid polycarbonate piece
The reinforcement should extend beyond both sides of the crack.
Do not make the reinforcement unnecessarily thick because it could make the headphones uncomfortable.
The reinforcement should also follow the natural curve of the headband.
Step 5: Test the Reinforcement
Before using adhesive place the reinforcement over the damaged area.
Check that:
- The broken pieces line up correctly.
- The headband maintains its original shape.
- The reinforcement sits firmly against the band.
- No wires are trapped underneath.
- The repair will not press against your head.
This is called a dry fit.
A dry fit allows you to make adjustments before applying adhesive.
Do not skip this step.
Once epoxy has been applied making adjustments becomes much more difficult.
Step 6: Apply the Epoxy
Mix the two parts of the epoxy according to the manufacturer’s instructions.
Apply enough epoxy to cover the damaged area and the surface where the reinforcement will sit.
Avoid using excessive adhesive.
Too much epoxy can create:
- Extra weight
- Sharp edges
- An uncomfortable repair
- Adhesive getting into moving parts
Position the broken pieces correctly.
Then place the reinforcement over the damaged area.
Press everything together carefully.
Step 7: Hold the Repair in Position
Use painter’s tape or another suitable method to keep the reinforcement securely positioned while the adhesive cures.
Make sure the headband remains in its natural resting position.
Do not stretch the headphones while the epoxy is curing.
The exact curing time depends on the adhesive you use.
Always follow the manufacturer’s instructions.
A structural repair should be allowed to cure completely before normal stress is applied.
Step 8: Inspect the Repair
Once the adhesive has completely cured carefully inspect the repair.
Look for:
- Gaps
- Loose reinforcement
- Sharp adhesive edges
- Misalignment
- New cracks around the original break
If necessary smooth rough edges carefully.
Do not immediately stretch the headphones as far as possible.
Start with gentle movement.
Step 9: Test the Headphones
Now test the headphones gradually.
First put the headphones on carefully without pulling the band too far.
Check whether:
- The repaired section moves excessively
- You hear cracking
- The earcups remain aligned
- The band maintains its shape
If you notice new cracks or movement around the repaired area stop using the headphones.
Consider a replacement part or professional repair.
Can You Fix a Broken Headphone Band With Super Glue?
Super glue can sometimes work for very small cracks.
However it is generally not the best solution for a heavily stressed headband.
The problem is that headphone bands repeatedly flex.
A glue only repair may hold initially but fail when the band is stretched.
For a temporary repair super glue may be useful.
For a structural repair reinforcement is usually a better approach.
How to Fix Broken Headphone Band With Tape
If you need a quick temporary solution strong tape can help.
This method is useful when you need to keep using the headphones until you can obtain a replacement part.
Method
- Align the broken pieces.
- Hold them in their normal position.
- Wrap strong tape around the damaged area.
- Make several tight overlapping layers.
- Keep the tape away from moving hinges.
- Check that the headphones remain comfortable.
Tape is generally a temporary repair rather than the best long term solution.
If the headphones are expensive use tape only as a temporary measure while checking official repair options.
How to Fix a Completely Snapped Headphone Band
A completely snapped band requires more reinforcement than a small crack.
First inspect both broken pieces.
Make sure they can be positioned back into their original shape.
If the plastic is not severely damaged you can create a longer reinforcement splint.
The splint should cover a significant section on both sides of the break.
Apply epoxy to the damaged area.
Position the two pieces together.
Then place the reinforcement over the repaired section.
Secure everything until the epoxy has completely cured.
After curing inspect the repair carefully.
A completely snapped headband may require more than one reinforcement layer.
However adding too much material can make the headphones uncomfortable.
How to Fix a Cracked Headphone Band
A small crack is easier to repair than a complete break.
Start by cleaning the damaged area.
Then gently roughen the plastic using fine sandpaper.
Apply an appropriate plastic adhesive.
If the crack is located in a high stress area add a small reinforcement strip.
Allow the adhesive to cure completely.
A small crack should be repaired early because continued use can cause it to spread.
What If the Headphone Hinge Is Broken?
Headphone hinges can be more difficult to repair than the main headband.
The hinge usually moves every time the earcups are folded or adjusted.
Glue alone may not withstand this movement.
If the hinge itself is broken check whether the manufacturer sells a replacement component.
A replacement hinge or headband is usually preferable to a glue only repair.
Bose provides official repair and replacement options for supported products.
Bose Official Repair and Replacement Support
When Should You Replace the Headband?
Sometimes repairing the original band is not worth the effort.
Consider replacement when:
- The band has multiple cracks.
- The plastic has become brittle.
- The hinge is completely destroyed.
- Internal wires are damaged.
- The repair makes the headphones uncomfortable.
- The headband continues cracking.
- An official replacement part is available.
A replacement is often the cleanest solution because it restores the original structure rather than adding a bulky repair.
Official Headphone Manufacturer Support
Before attempting a DIY repair check your headphone manufacturer’s official support page.
Sony
Sony provides official support and repair information for selected headphone models.
Bose
Bose provides official repair and replacement support for supported products.
Bose Official Repair and Replacement Support
Sennheiser
Sennheiser provides official support for its headphones and other audio products.
Sennheiser Spare Parts
Sennheiser also provides information about spare parts for supported products.
Sennheiser Spare Parts Information
How to Prevent Your Headphone Band From Breaking Again
After successfully fixing your headphones prevention is important.
1. Store Your Headphones Properly
Keep your headphones in a protective case when you are not using them.
Avoid throwing them into a backpack where books chargers or other objects can press against the band.
2. Do Not Stretch the Band Excessively
Put the headphones on by gently positioning them over your ears.
Avoid pulling the headband unnecessarily wide.
3. Protect Them From Falls
Dropping headphones onto a hard surface can create cracks that may not be immediately visible.
Handle your headphones carefully when moving them.
4. Keep Them Away From Extreme Heat
Excessive heat can affect some plastics and adhesives.
Avoid leaving headphones inside a hot car for long periods.
5. Check Cracks Early
If you notice a small crack repair or replace the damaged component before it becomes a complete break.
A small crack is usually easier to repair than a completely snapped headband.
Frequently Asked Questions
What is the easiest way to fix a broken headphone band?
For a temporary repair strong tape is the easiest option.
For a stronger DIY repair use a suitable adhesive together with a reinforcement strip.
Can I use super glue on a broken headphone band?
You can use super glue for some small cracks.
However super glue alone may not withstand repeated bending.
A reinforced repair is usually more suitable for structural breaks.
Is epoxy good for headphone bands?
Epoxy can be useful when combined with a reinforcement strip.
The reinforcement helps carry the mechanical load while the epoxy helps secure it.
Can a completely snapped headphone band be repaired?
Yes. Depending on the design and condition of the headphones a reinforcement splint can sometimes restore a snapped plastic band.
Should I repair or replace my headphones?
If the electronics and battery work properly and the headband is the only damaged component repairing or replacing the headband may be worthwhile.
If several components are damaged replacement headphones may make more sense.
What if the wires inside the headband are broken?
A structural repair will not restore the audio connection.
Damaged wires may require electrical repair.
Avoid covering exposed wires with adhesive.
How long can a repaired headphone band last?
The lifespan depends on the quality of the repair the material used and how much stress the headband experiences.
A properly reinforced repair can last significantly longer than a glue only repair.
Can I repair a headphone band without epoxy?
Yes.
For a temporary repair you can use strong tape.
For a more durable repair you can use another adhesive that is compatible with the headband material.
Always check the adhesive manufacturer’s instructions before use.
Final Thoughts
Learning how to fix broken headphone band can save you money when your headphones are otherwise working perfectly.
The best repair depends on the type of damage.
For minor damage tape may provide a temporary solution.
For a serious crack or complete break a reinforced repair is usually stronger than glue alone.
A good DIY repair generally involves cleaning the damaged area carefully aligning the broken pieces adding reinforcement and using an appropriate adhesive.
Before permanently modifying expensive headphones check the manufacturer’s official repair options.
Companies such as Sony Bose and Sennheiser provide repair replacement or spare part services for selected products.
With the right approach you may be able to extend the life of your headphones instead of buying a completely new pair.